Setup OpenGL with Visual Studio 2019 on Windows 10 x64
Introduction
Open Graphics Library is a cross-language, cross-platform application programming interface for rendering 2D and 3D vector graphics. The API is typically used to interact with a graphics processing unit, to achieve hardware-accelerated rendering.
Prerequisites
To execute your graphics applications written using OpenGL libraries, you can use Visual Studio.
Microsoft Visual Studio is an integrated development environment (IDE) from Microsoft. It is used to develop computer programs, as well as websites, web apps, web services and mobile apps.
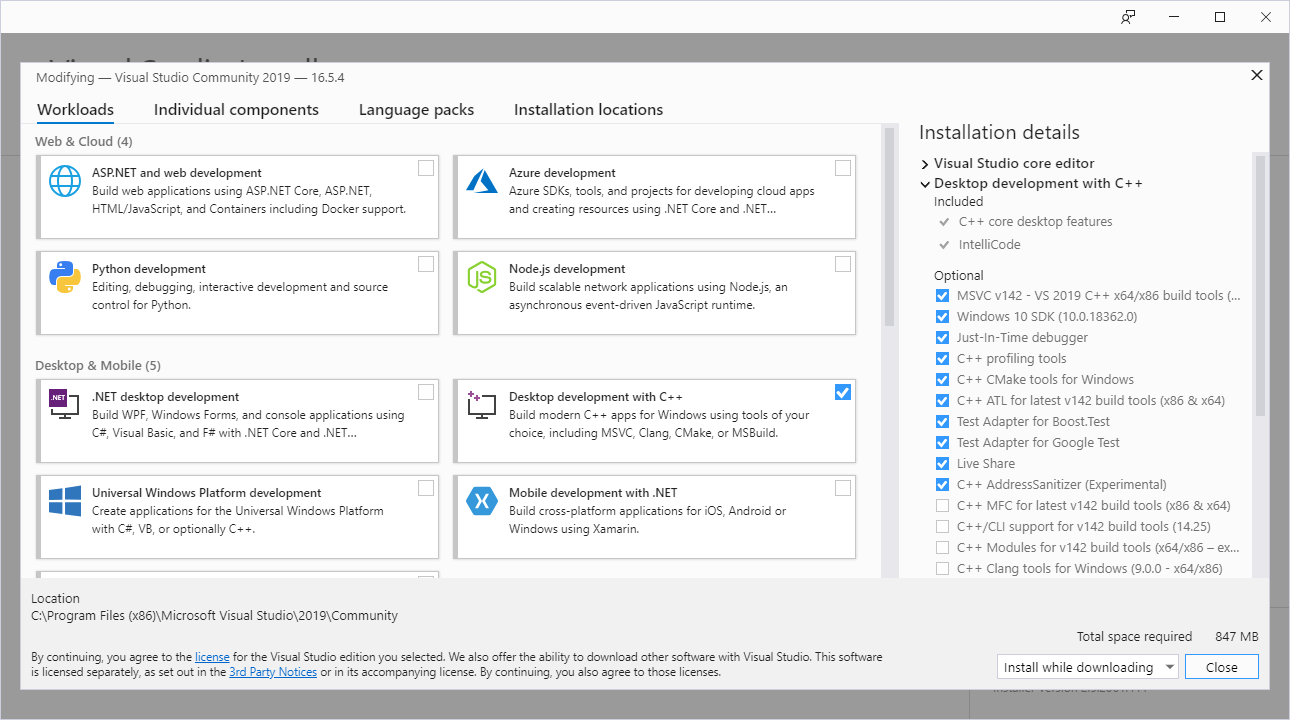
Install Visual Studio 2019 using the official installer with the required components as shown in the image below. (Recommended Community 2019)
Note
This tutorial does not install the OpenGL GLUT library permanently i.e. system-wide, this is to make sure there are no version conflicts later on, so in every project you can make use of a different version of GLUT without hindering the already if installed GLUT.
freeglut is also getting old, consider using newer libraries like GLEW and GLFW for C++, which is my only reason to not install GLUT system wide.
OpenGL Project Setup
We'll first download freeglut's binaries for msvc as mentioned in http://freeglut.sourceforge.net/
The freeglut project does not support packaged versions of freeglut excepting, of course, the tarballs distributed here. However, various members of the community have put time and effort into providing source or binary rollups.
- Download freeglut for MSVC freeglut-MSVC.
Alternatively download freeglut 3.0.0 MSVC Package from https://www.transmissionzero.co.uk/software/freeglut-devel/
Unzip the downloaded .zip and you'll get something like below, this includes the precompiled libraries and the required header and dll files as well.
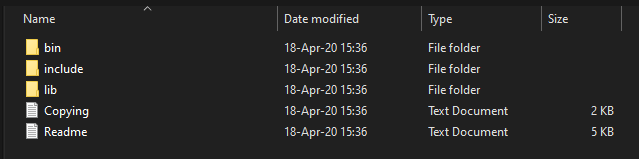
Copy the freeglut folder into C:\
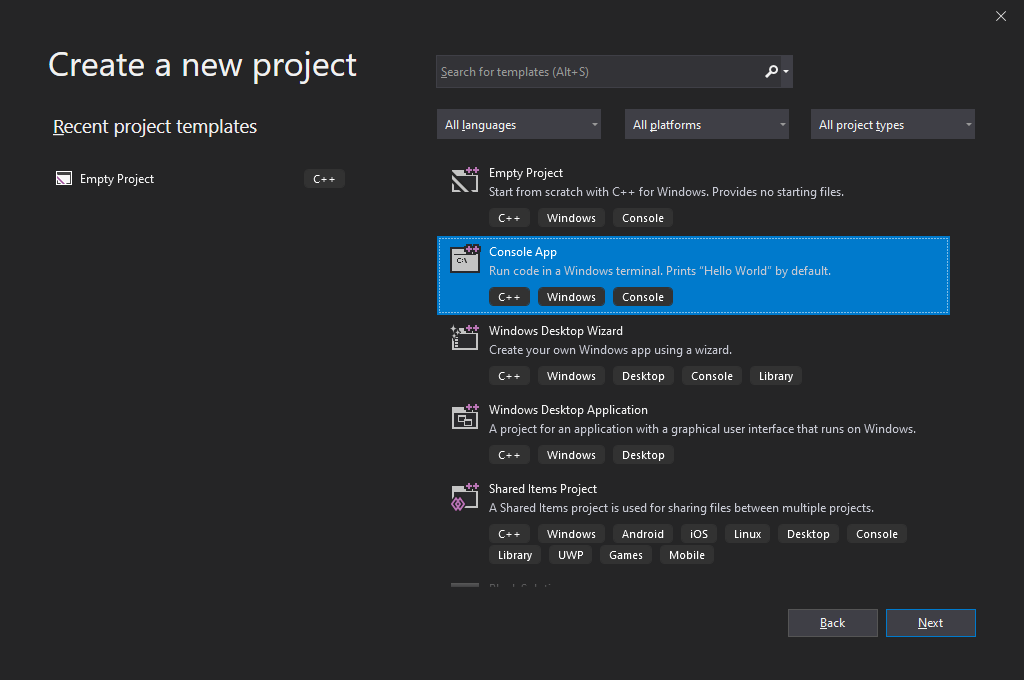
- Open Visual Studio 2019 and Create a new
Console AppProject
- Now we'll setup the linker and include paths for our
x64application
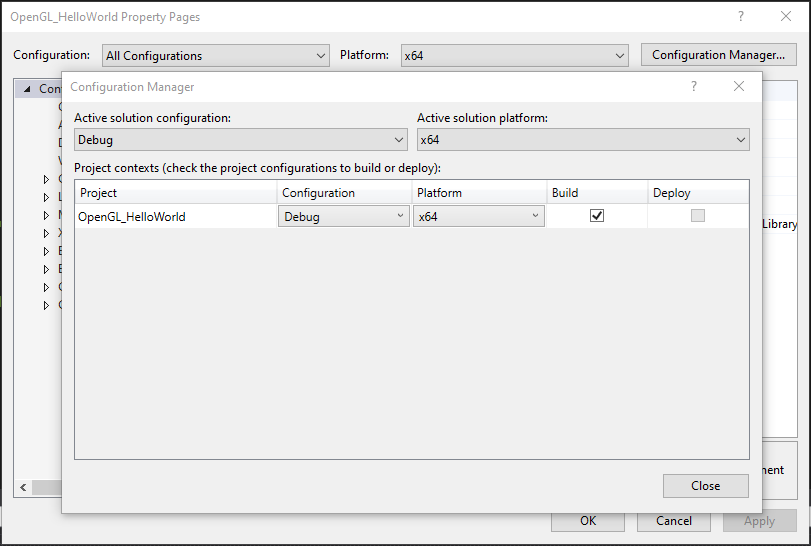
3.1 Open Project -> Properties and click on Configuration Manager... and set it to x64
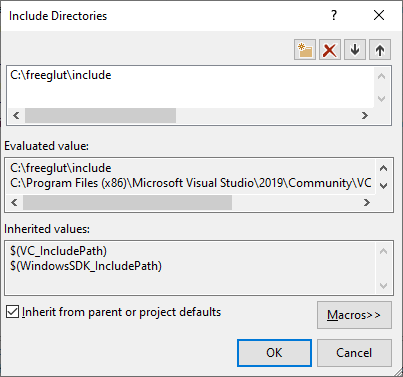
NOTE: To change a value click on the down arrow to the right and then click on <Edit...>, then you can select your directory path
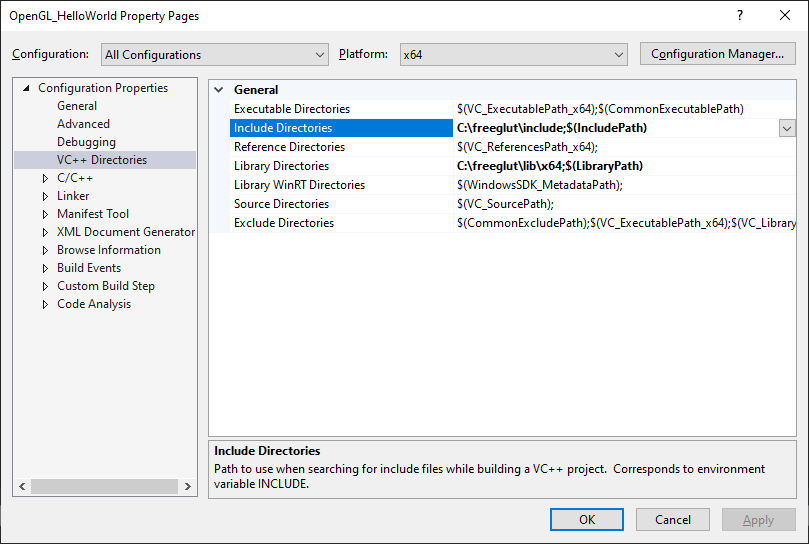
3.2 Set the Configuration Properties -> VC++ Directories to these values
i.e. Add C:\freeglut\include in Include Directories
and Add C:\freeglut\lib\x64 in Library Directories
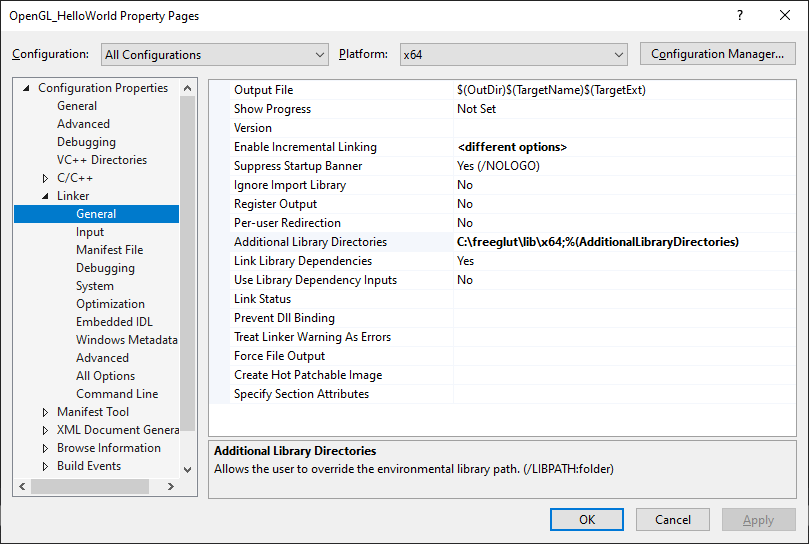
3.3 Set the Configuration Properties -> Linker -> Generalto these values
Add C:\freeglut\lib\x64 to Additional Library Directories
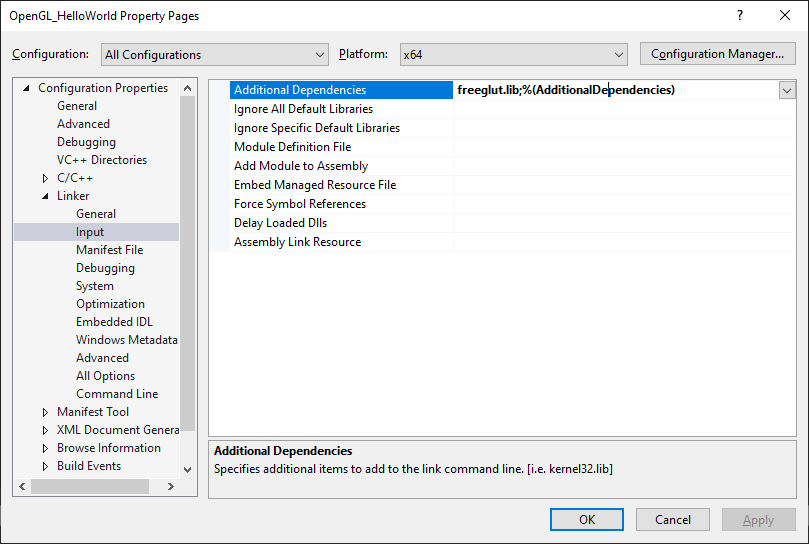
3.4 Set the Configuration Properties -> Linker -> Input to these values
Add freeglut.lib to Additional Dependencies
- Replace the code in your
<PROJECT_NAME>.cpp(in my caseOpenGL_HelloWorld.cpp) with the below code
#include <GL/freeglut.h>

void display() {

    /* clear window */
    glClear(GL_COLOR_BUFFER_BIT);

    /* draw scene */
    glutSolidTeapot(.5);

    /* flush drawing routines to the window */
    glFlush();

}

int main(int argc, char* argv[]) {

    /* initialize GLUT, using any commandline parameters passed to the
       program */
    glutInit(&argc, argv);

    /* setup the size, position, and display mode for new windows */
    glutInitWindowSize(500, 500);
    glutInitWindowPosition(0, 0);
    glutInitDisplayMode(GLUT_RGB);

    /* create and set up a window */
    glutCreateWindow("hello, teapot!");
    glutDisplayFunc(display);

    /* tell GLUT to wait for events */
    glutMainLoop();
}
- Build the Project 🚀
Build->Build Solution
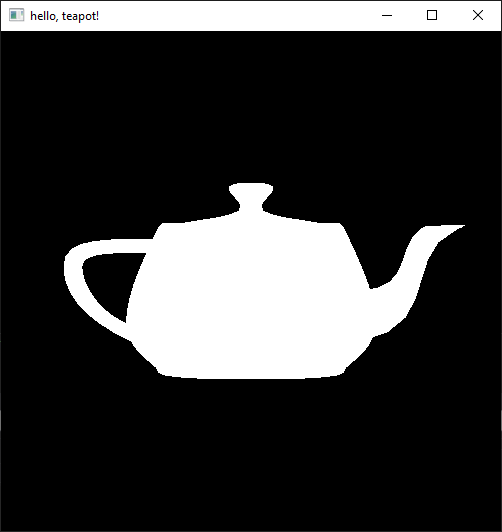
If you followed the tutorial you should see something like this

- Now to run the executable we need
freeglut.dllwhich is inC:\freeglut\bin\x64
Copy freeglut.dll to <YOUR_PROJECT_DIRECTORY>\x64\Debug\, in my case C:\Users\shadowleaf\source\repos\OpenGL_HelloWorld\x64\Debug\
- Run the Executable !
Click on Debug -> Start Without Debugging
Example Project is in https://github.com/satyajitghana/satyajitghana.github.io/tree/adda469a7cd04167acf2c7622d096a63c821a350/blog/opengl-vs19/example/OpenGL_HelloWorld
That is it folks !
shadowleaf